Set Up Gmail Forwarding
Connect Gmail to an existing Avery Smart Inbox, then create a filter so only messages that belong in that inbox are forwarded to AveryIQ.
You must use Gmail on a computer to complete this setup. If you use a managed Google Workspace account, your administrator may restrict automatic forwarding.
Add the AveryIQ Address to Gmail
- In AveryIQ, open Settings > Inboxes and copy the address of the Smart Inbox you want to use.
- On a computer, open Gmail and select Settings > See all settings.
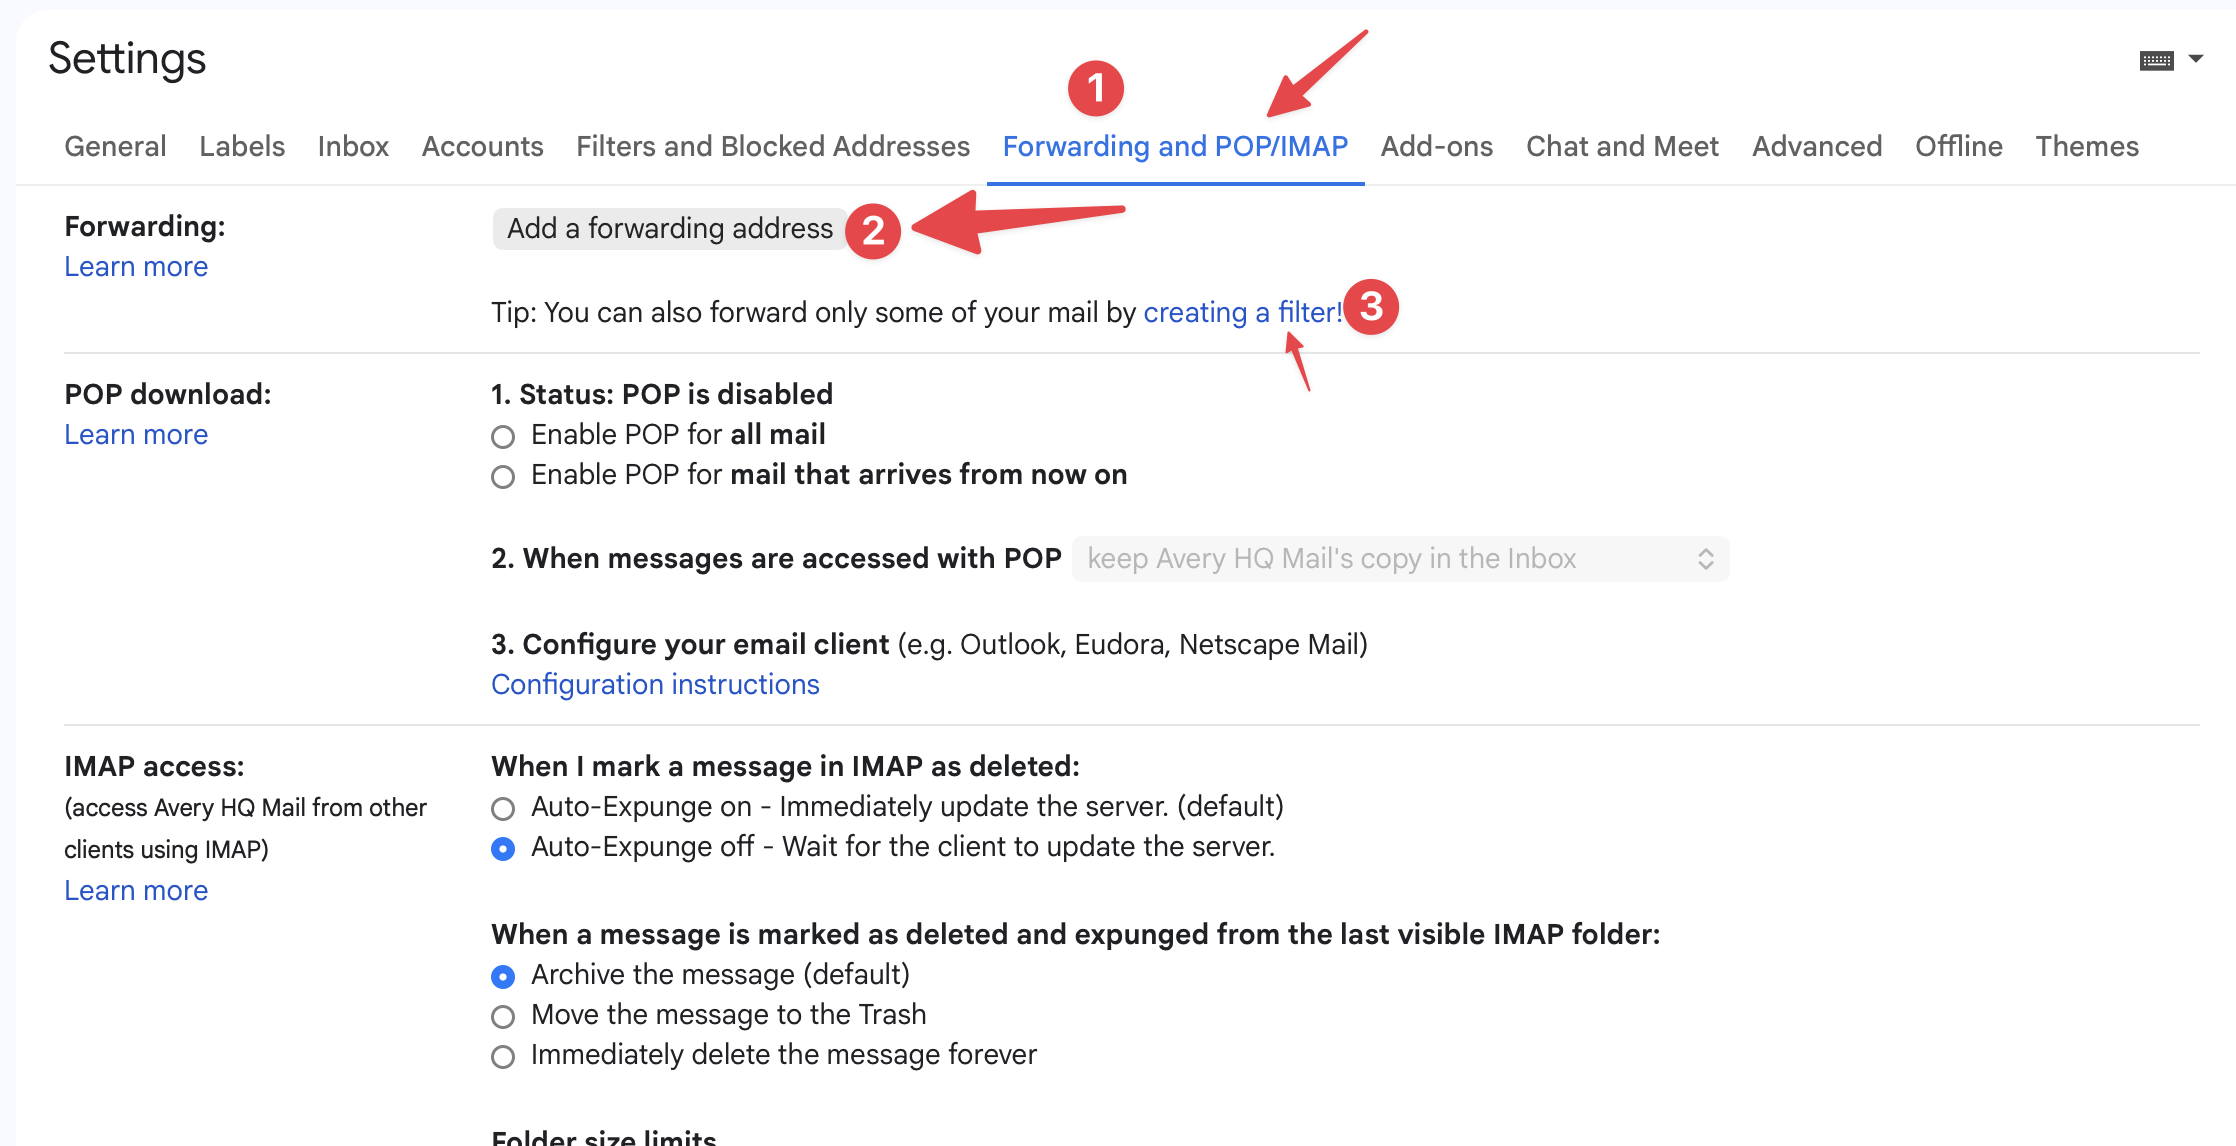
- Open Forwarding and POP/IMAP.
- Select Add a forwarding address.
- Paste the AveryIQ inbox address and select Next.
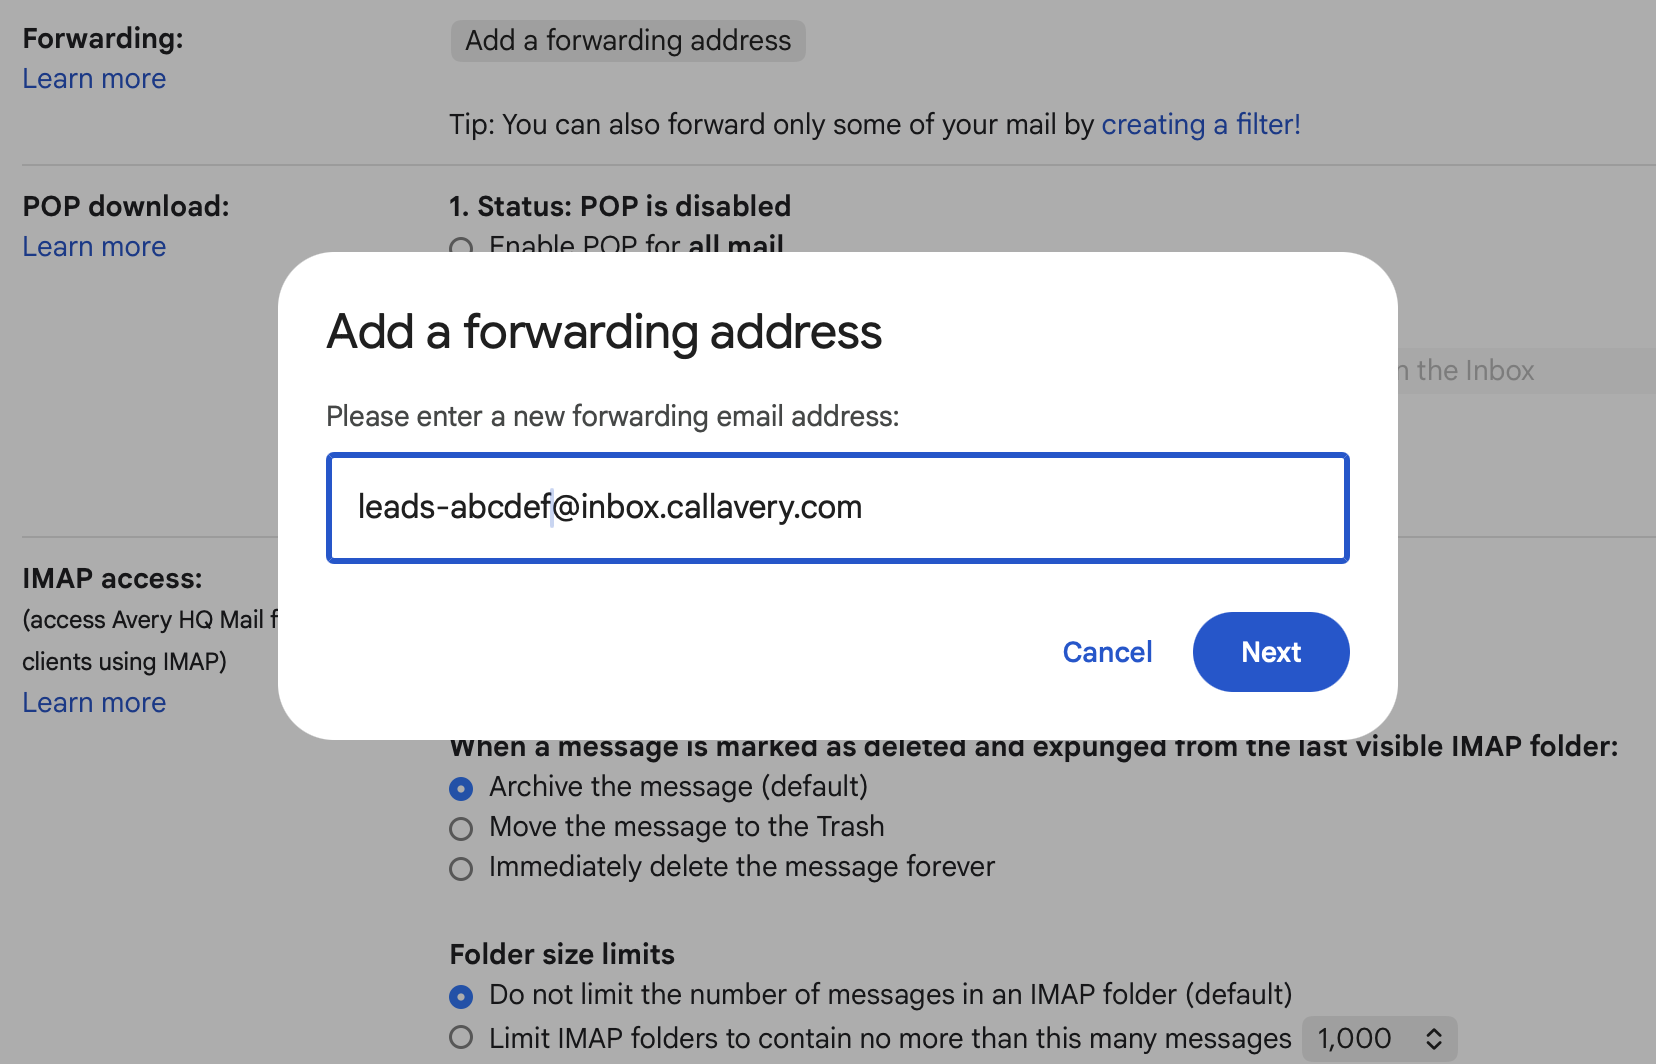
- Review the address, then allow Gmail to send its confirmation email.
Approve the Confirmation Request
- Return to Settings > Inboxes in AveryIQ.
- Select the mail icon beside the Smart Inbox to open Recent emails.
- Expand the forwarding confirmation email from
[email protected]. - Copy the complete confirmation link beginning with
https://mail-settings.google.com/and paste it into a new browser tab.
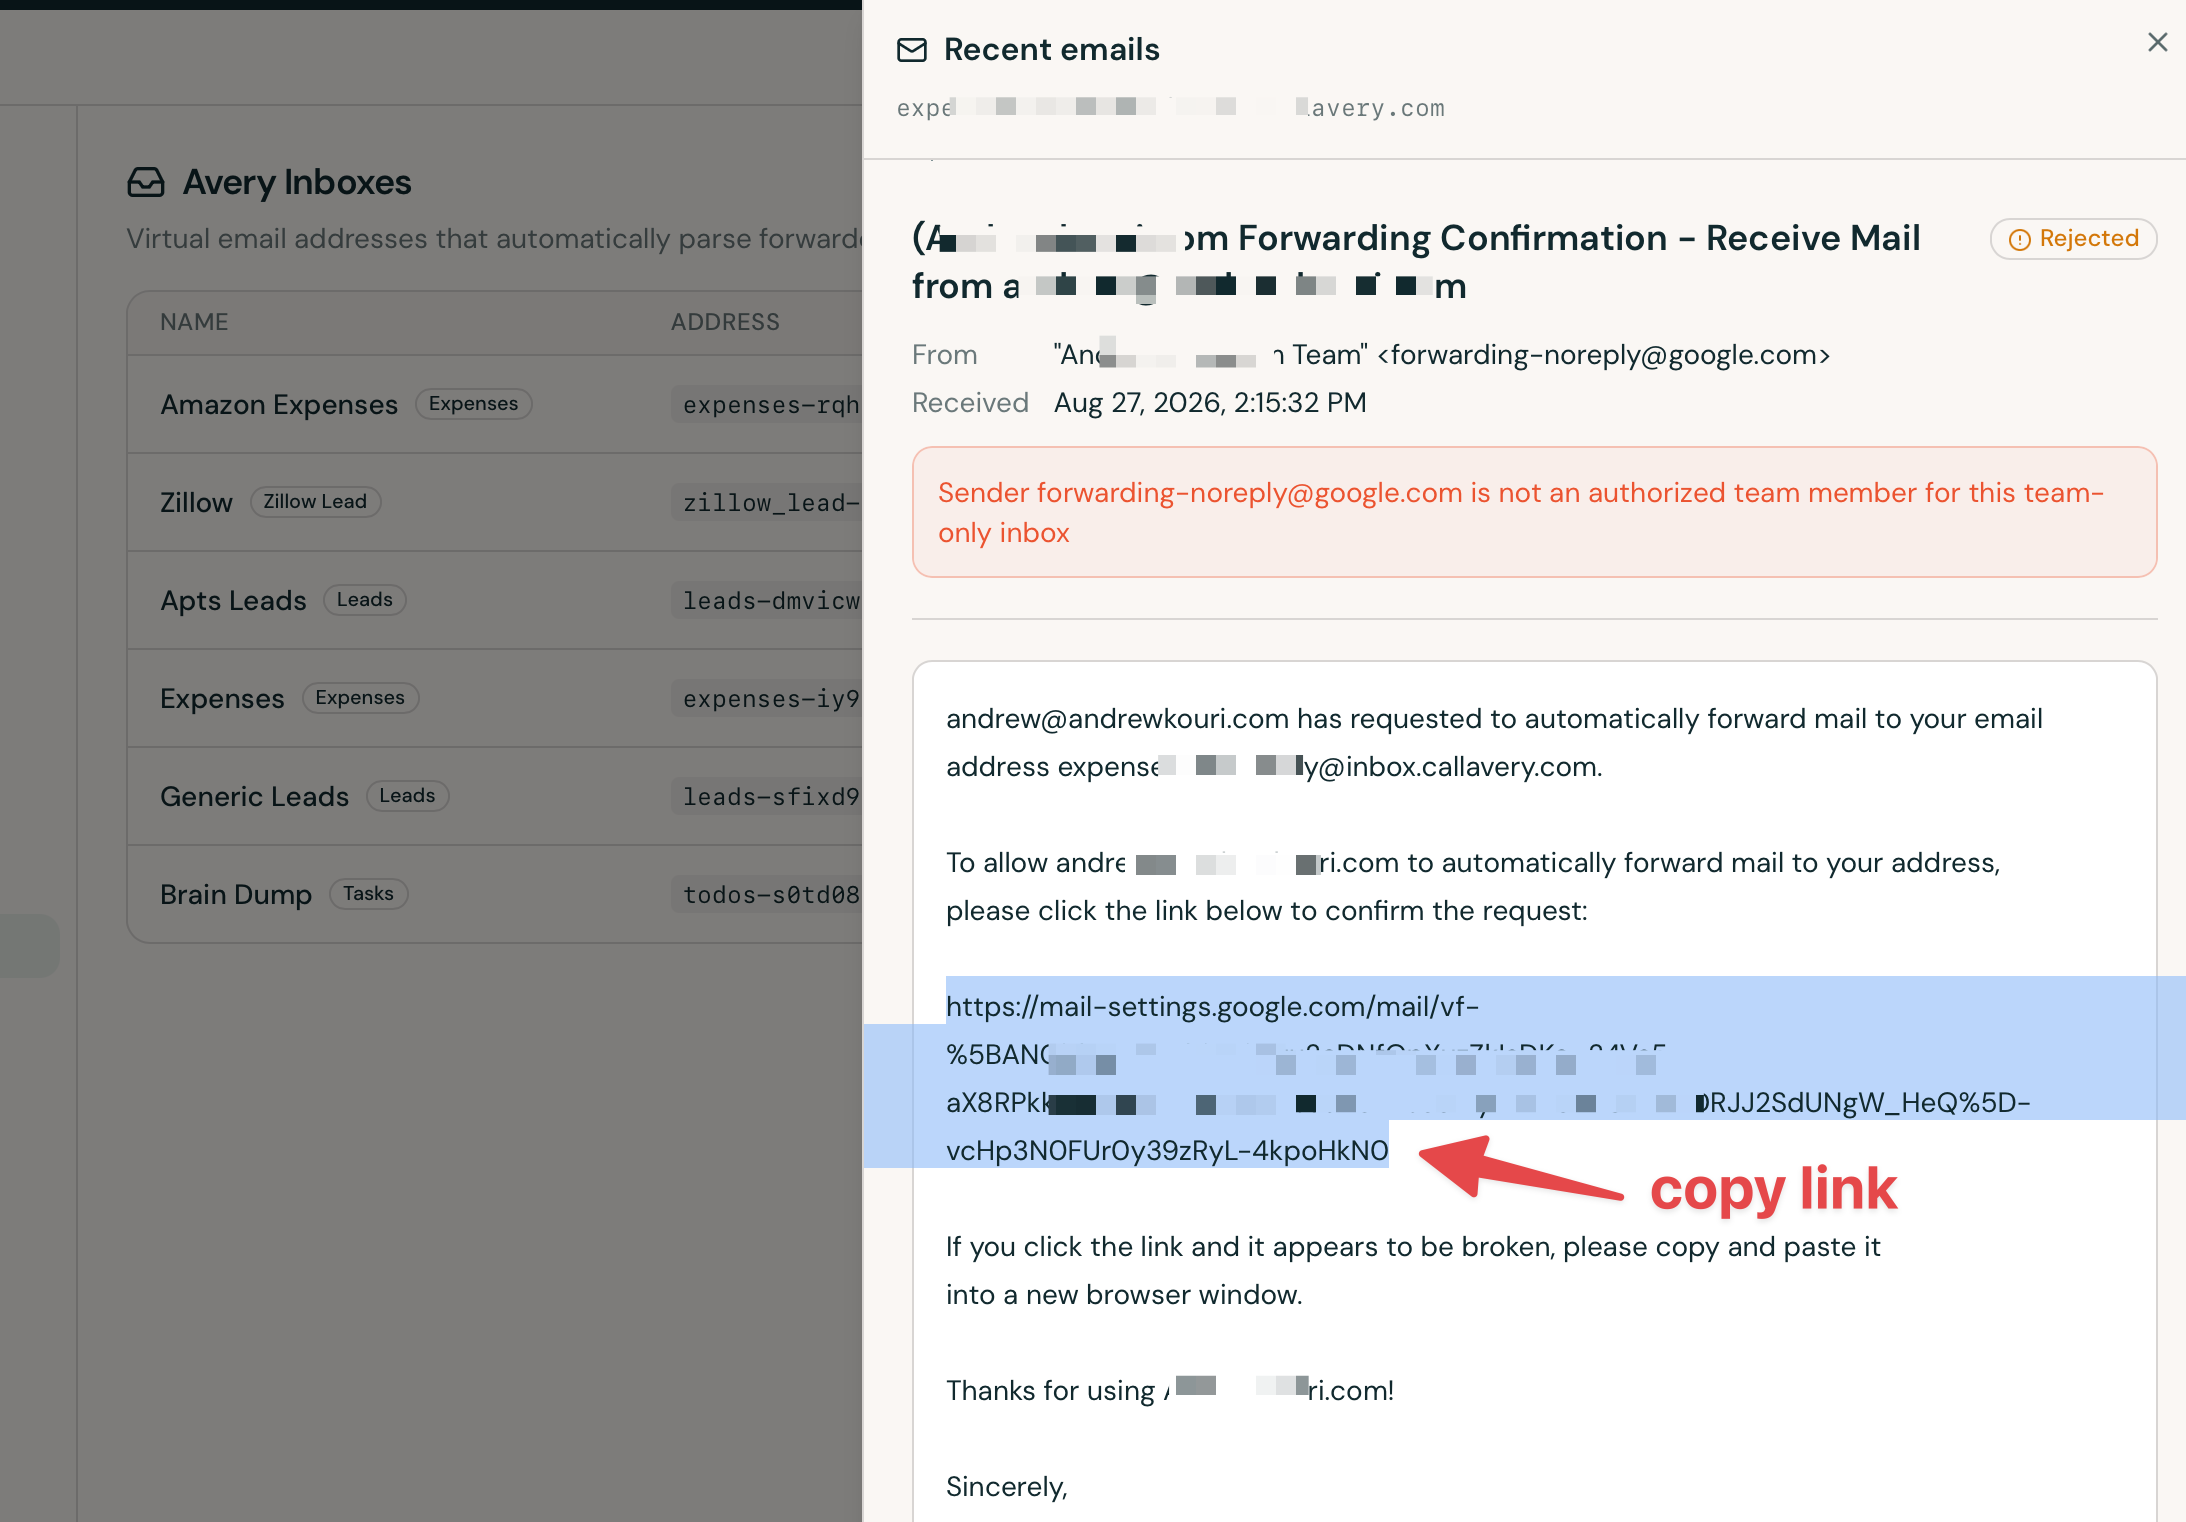
The confirmation email may show as Rejected when the Smart Inbox allows only team members. That is expected: Google is not a team member, but AveryIQ still keeps the email in Recent emails so you can complete verification.
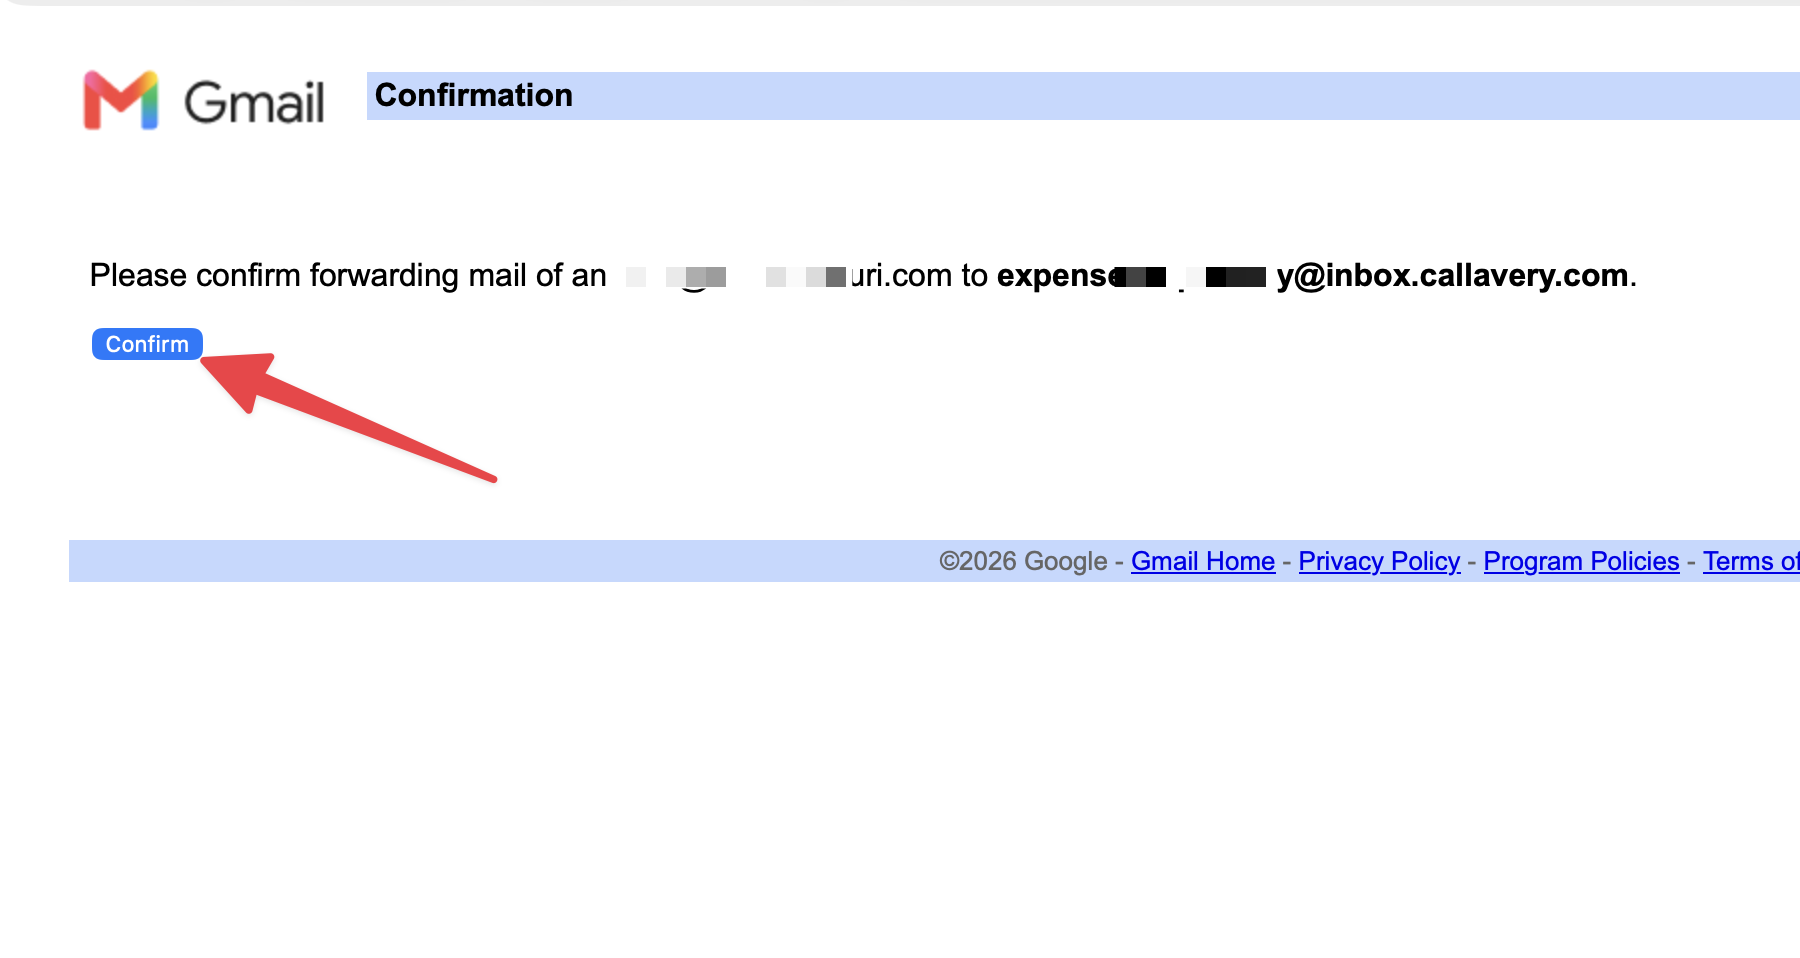
- On Google’s confirmation page, select Confirm.
- Return to Gmail’s Forwarding and POP/IMAP settings and refresh the page. The AveryIQ address should now be available as a forwarding destination.
Create a Filter for the Messages You Want
Keep whole-mailbox forwarding disabled unless every new message belongs in this Smart Inbox. A filter gives you control over which messages Gmail sends to AveryIQ.
- In Gmail’s search box, select Show search options.
- Enter criteria that identify only the messages for this Smart Inbox. The guide for your goal may provide exact criteria.
- Select Search first and review the results. Adjust the criteria if unrelated messages appear.
- Open the search options again and select Create filter.
- Select Forward it to, then choose the AveryIQ address.
- Select Create filter.
Gmail applies a new forwarding filter only to messages received after the filter is created. Leave Also apply filter to matching conversations cleared unless you intentionally want Gmail to perform the other selected filter actions on existing conversations.
Test the Connection
Wait for a new message that matches the filter. In AveryIQ, select the mail icon beside the Smart Inbox and confirm that the message appears under Recent emails.
If it does not appear:
- Confirm the AveryIQ forwarding address is verified in Gmail.
- Search Gmail using the filter criteria and make sure the expected message matches.
- Confirm Forward it to points to the correct Smart Inbox.
- Check whether your Google Workspace administrator blocks external forwarding.
For Gmail’s current forwarding controls and limitations, see Automatically forward Gmail messages to another account .